A practical guide for school event committees
How to Plan a Great Prom or School Dance
Printable planning list
- Confirm the event purpose, student audience, date range, spending limit, and approval process.
- Name the adult advisor, student chair, treasurer, and leads for venue, entertainment, decor, tickets, promotion, guest experience, and event-night operations.
- Reserve the venue and verify capacity, accessibility, parking, restrooms, power, sound limits, setup time, cleanup time, and vendor rules.
- Choose the theme only after the venue and budget are known, then use one visual system across tickets, promotion, entrance signs, photo area, and tables.
- Set the ticket price, eligibility rules, guest policy, sales dates, refund policy, capacity count, and check-in method before sales begin.
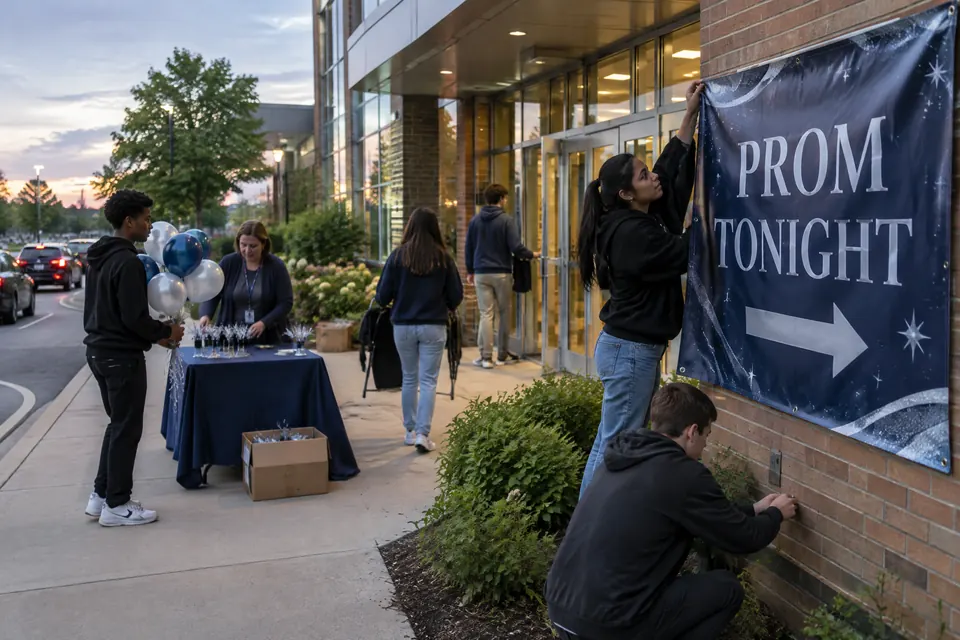
- Build a promotion schedule using announcements, digital channels, flyers, small posters, large posters, and an outdoor banner where each format is permitted.
- Review accessibility requests, student supervision, medical contacts, emergency roles, arrival and departure procedures, and the school's existing safety plan.
- Complete a written run-of-show, setup map, volunteer schedule, vendor contact sheet, weather backup, cleanup assignments, and final walkthrough.
Step 1 Set Goals, Date, and Budget
Start with the decisions that limit every later choice
Quick checklist
- One-sentence event purpose and eligible audience
- Primary date, backup date, approval deadline, and venue hold
- Conservative attendance estimate and hard capacity
- Required-cost budget, optional upgrades, and contingency reserve
- Ticket-revenue scenario that works below a sellout
- Define what the event is meant to accomplish before comparing themes or decorations.
- Prom may mark a senior-year milestone; homecoming may build school spirit; a smaller dance may provide an affordable social event or support a student organization.
- Write the purpose in one sentence and decide which students may attend, whether guests from outside the school are permitted, and which administrator gives final approval.
- Choose a date only after checking the school calendar, testing schedules, athletic events, holidays, venue availability, transportation concerns, and any planned after-event program.
- Reserve enough time for setup and teardown rather than booking only the hours when students are present.
- If the date depends on an off-campus venue or major vendor, hold an approved backup date until contracts are complete.
- Build the budget from required costs first: venue, security or school supervision, insurance when required, entertainment, sound and lighting, food or refreshments, custodial service, transportation, printing, decorations, photo services, and a contingency reserve.
- Request written quotes, note deposit and cancellation deadlines, and separate must-have expenses from upgrades.
- Test the budget at conservative ticket sales rather than assuming the room will sell out.
Step 2 Build the Prom or Dance Committee
Give every important outcome one accountable owner
Quick checklist
- Adult advisor and student committee chair
- Budget and purchasing lead
- Venue, vendor, entertainment, and decor leads
- Ticketing, publicity, guest experience, and accessibility leads
- Event-night coordinator with one current contact sheet
- Use one adult advisor and one student chair to keep decisions connected.
- Smaller schools may combine jobs, while larger committees may use separate leads for finance, venue and vendors, entertainment, food, decorations, publicity, tickets and guest records, accessibility, photography, and event-night operations.
- The key is not the number of committees; it is knowing who owns each deadline and who can approve a change.
- Create a shared task list with one responsible person, one due date, and one approval status for every assignment.
- Use short agendas for committee meetings, record decisions, and end each meeting by confirming the next action.
- Adult staff should handle contracts, policy questions, payment authority, student records, and any work that school rules do not permit students to manage.
- Work backward from the dance.
- Secure the date, venue, major vendors, and budget early; approve the theme and visual direction next; finalize ticket rules and promotion before sales launch; then freeze the floor plan, guest-service plan, volunteer schedule, signage locations, and run-of-show.
- Schedule a final walkthrough with the venue, advisor, setup lead, accessibility contact, and event-night coordinator.
Step 3 Choose the Venue, Theme, and Vendors
Make the theme fit the room instead of fighting it
Quick checklist
- Capacity, accessibility, parking, restrooms, exits, and guest route verified
- Theme palette approved for print, decor, lighting, and digital use
- Vendor scopes, deposits, deadlines, contacts, and cancellation terms recorded
- Photo area, quiet seating, refreshments, DJ, and check-in placed on one floor plan
- Setup, teardown, storage, and venue-protection rules confirmed
- Inspect the venue in person before committing.
- Verify legal capacity, accessible parking and drop-off, entrances, elevators or ramps, restrooms, barrier-free routes, coat storage, quiet space, staff areas, emergency exits, power, internet needs, sound restrictions, loading access, setup windows, cleanup requirements, and what the venue supplies.
- Walk the guest route from arrival through check-in, the dance floor, refreshments, photo area, seating, and departure.
- Select a theme that can be expressed with color, lighting, music, and a few strong focal points.
- A clear palette is more useful than a long theme name because it coordinates the ticket, posters, banner, backdrop, table tents, and digital promotion.
- Check that decorative materials, power cords, draping, temporary structures, fog effects, candles, and hanging methods are permitted by the school and venue.
- Use written scopes for the DJ or band, photographer, caterer, decorator, rental company, transportation provider, and any security service.
- Record arrival times, equipment needs, power needs, meal arrangements, proof-of-insurance requirements, cancellation terms, payment dates, and the name of the adult authorized to request changes.
- Keep a backup contact and a practical fallback for each service that would materially affect the event.
Step 4 Plan Tickets and Guest Check-In
Turn ticket sales into a reliable guest and capacity count
Quick checklist
- Eligibility, guest approval, sales dates, capacity, and refund rules published
- One master count for printed, online, complimentary, staff, and vendor attendance
- Ticket number or stub has a defined tracking purpose
- Alphabetical guest list and exception-resolution station prepared
- Cash, electronic payment, unsold tickets, and receipts reconciled
- Decide who may buy a ticket, whether outside guests require an approval form, how many tickets may be sold, whether sales close before the event, and whether any tickets are available at the door.
- Publish the same policy everywhere and identify who can answer an exception request.
- If complimentary tickets, chaperones, performers, or vendors count toward capacity, include them in the same master count.
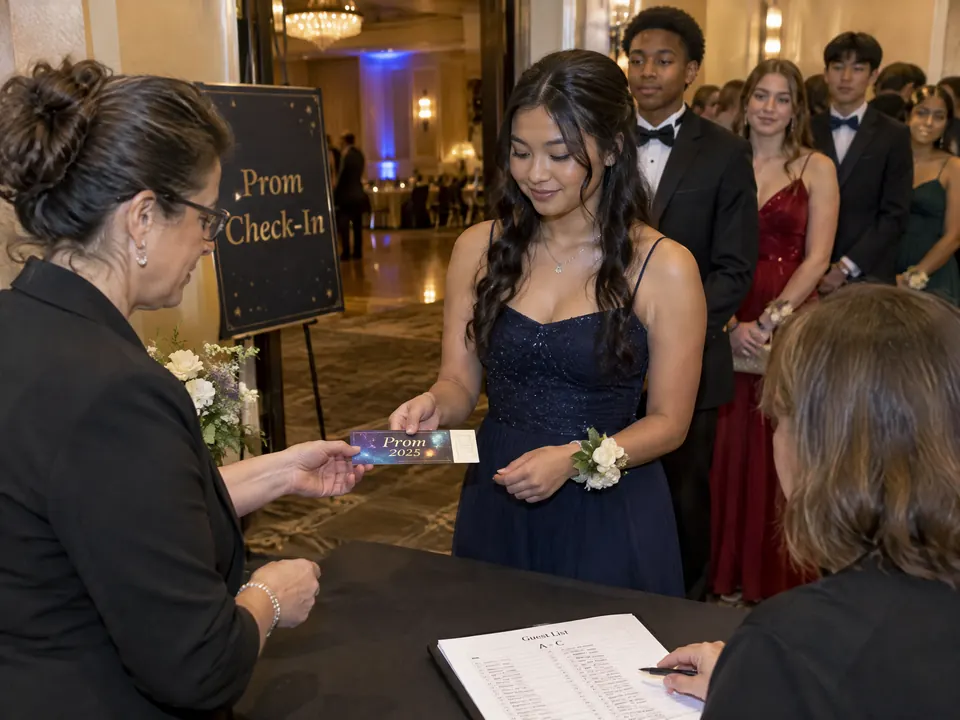
- A printed prom or dance ticket should prioritize the event name, school or host, date, time, venue, admission terms, and any instruction students must see before arrival.
- Numbering or a detachable stub can support sales control and check-in when the committee has a defined use for it.
- Match the ticket's colors and type to the rest of the event, but keep the essential information readable in normal lighting.
- Choose a check-in method before sales begin.
- Reconcile printed ticket numbers or online records into one approved guest list, define how identification and guest forms are checked, and prepare a clearly supervised process for problems.
- Separate the normal line from guest-policy questions so one missing record does not stop everyone.
- Protect student information and follow school rules for records, payments, and refunds.
Step 5 Promote the Dance
Build recognition by repeating one accurate message
Quick checklist
- One approved fact sheet for all print and digital promotion
- Flyer, small-poster, large-poster, banner, and yard-sign locations approved
- Ticket on-sale, reminder, deadline, and event-day messages scheduled
- Accessible contact and official update channel included
- Correction and post-event removal responsibility assigned
- Create one approved fact sheet with the event name, audience, date, time, venue, ticket price, sales dates, purchase method, guest rules, dress expectations if any, accessibility contact, and official source for updates.
- Every announcement, flyer, poster, banner, and social post should draw from that sheet.
- A coordinated campaign looks intentional and reduces the risk of students acting on an outdated detail.
- Use formats according to viewing distance.
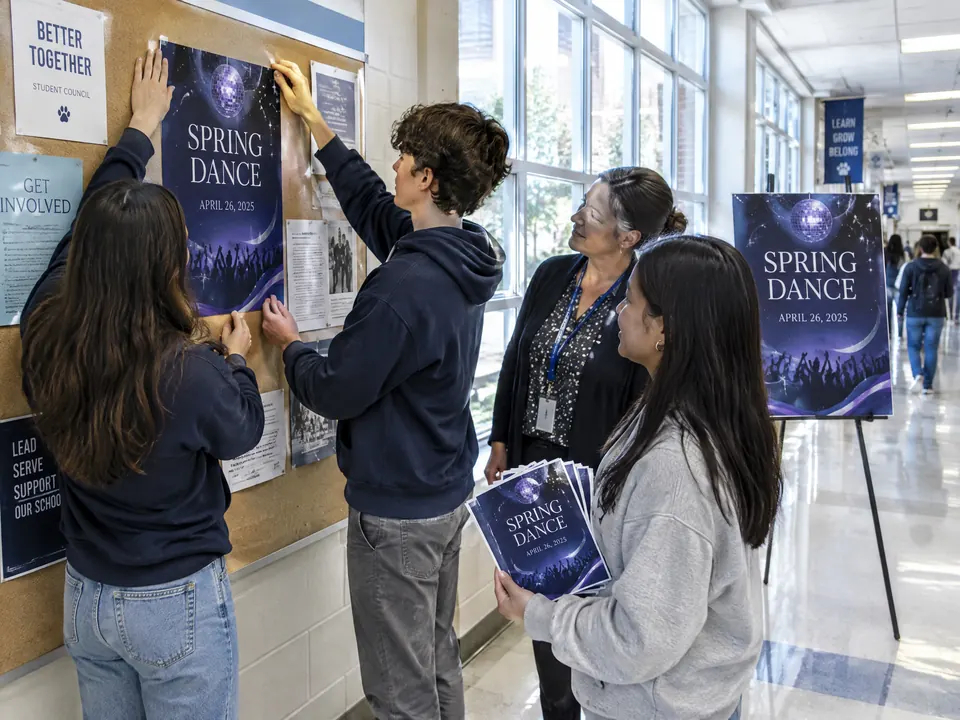
- Flyers can carry the full sales instructions; small posters work on bulletin boards and near ticket-sale locations; large posters support entrances, commons areas, and approved high-traffic displays; an outdoor banner can announce the event or identify the arrival point from farther away.
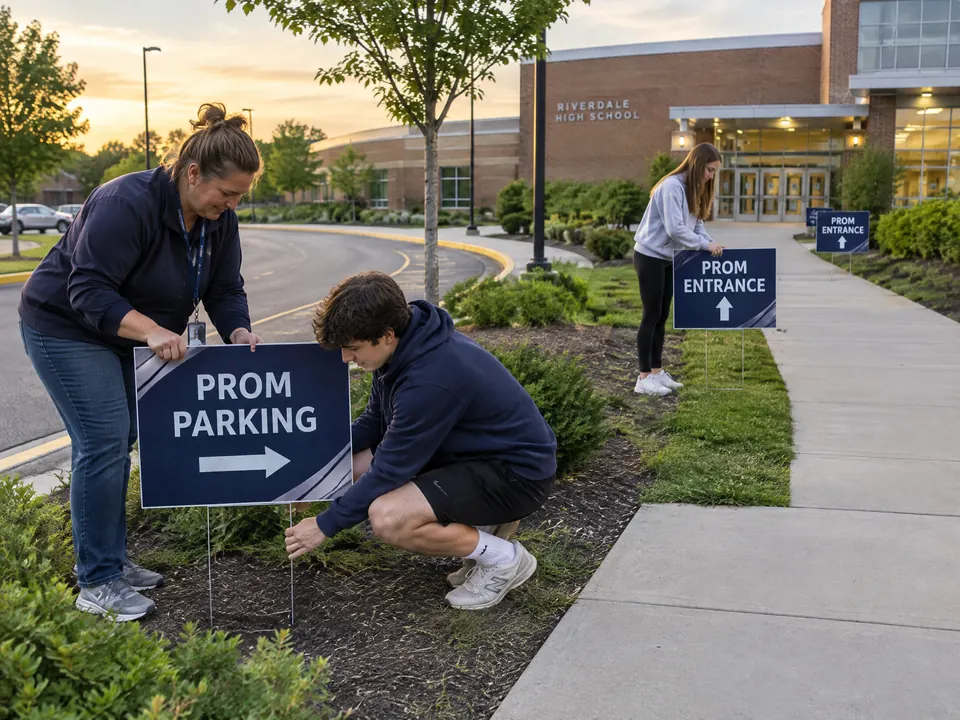
- Yard signs can guide parking and entrances on event night when the school, property owner, and local sign rules permit them.
- Plan a sequence instead of releasing everything at once.
- Announce the date and theme, open ticket sales, show progress or a design reveal, send a deadline reminder, explain guest and check-in rules, and post an event-day arrival reminder.
- Assign one person to update every channel if a detail changes and one person to remove temporary printed materials after the event.

Step 6 Design the Guest Experience
Design the room as a sequence of useful destinations
Quick checklist
- Arrival, check-in, dance floor, refreshments, photos, seating, and departure mapped
- Backdrop size, support, lighting, line location, and photo policy confirmed
- Table tents identify guest-service areas with short readable wording
- Quiet seating, clear aisles, hydration, and allergen information planned
- Decorations preserve exits, signs, sightlines, and accessible routes
- Map the experience from the moment a student approaches the site.
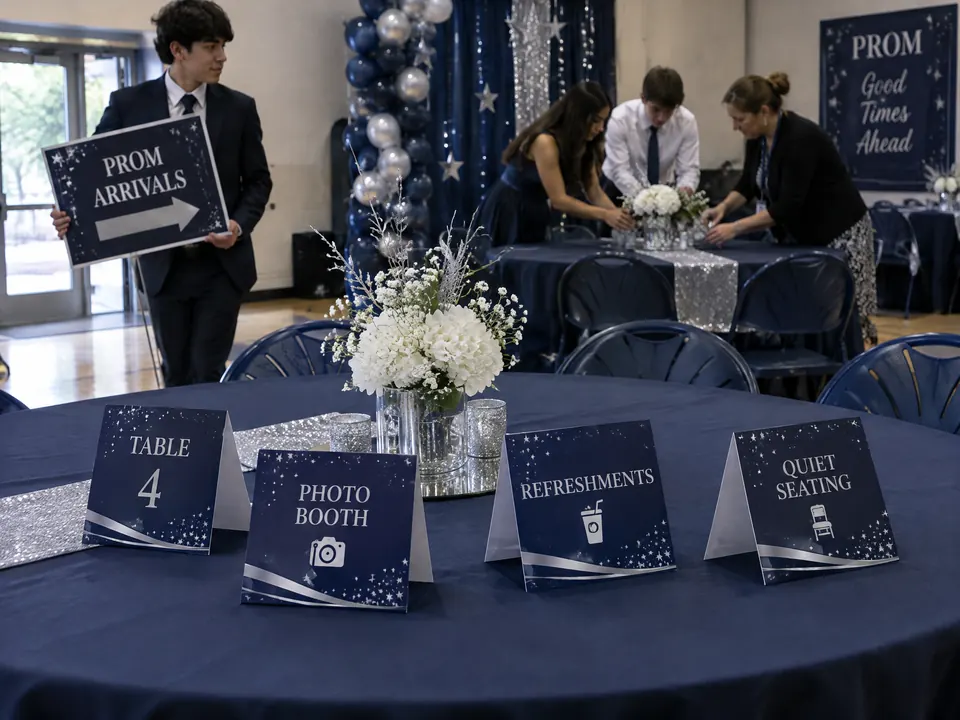
- An outdoor banner and permitted yard signs can clarify arrival; check-in signage should separate the normal line from guest questions; table tents can identify table numbers, refreshments, photo booth, coat area, quiet seating, or sponsor recognition without requiring repeated announcements.
- Keep paths, exits, and accessible routes clear.
- Plan the photo area as an operating station, not only decoration.
- A printed photo backdrop should be sized for the expected group, stabilized according to the supplier and venue rules, lit without blocking circulation, and positioned where the line will not cross the entrance or dance floor.
- Decide whether the photographer, students, or volunteers control the queue and how images may be used under school policy.
- Balance activity with places to pause.
- Provide seating away from the loudest speakers, clearly identify refreshments and allergen information, keep hydration easy to find, and designate an adult contact for accommodation needs.
- Use the floor plan to confirm sightlines for announcements, coronation or awards, and emergency communication before decorations are installed.

Step 7 Confirm Safety, Accessibility, and Event-Night Roles
Connect the celebration to the school's approved operating plan
Quick checklist
- School emergency plan, venue procedures, and event contacts reviewed
- Chaperone zones, communication method, medical response, and departure rules assigned
- Accommodation contact and accessible route walkthrough completed
- Minute-by-minute run-of-show and setup map distributed
- Cleanup, lockup, financial reconciliation, and post-event debrief assigned
- Review the event with the administrator responsible for the school's Emergency Operations Plan.
- Identify the adult event lead, chaperone zones, medical contact, venue contact, communication method, student release or departure procedure, and actions for weather, power, vendor, or transportation disruption.
- Staff and volunteers should understand their roles before students arrive and should not improvise a separate emergency system.
- Invite accommodation requests early and name a contact who will follow up.
- During the venue walkthrough, check accessible parking and drop-off, entrances, elevators or ramps, restrooms, barrier-free pathways, aisle widths, lighting, acoustics, seating options, and the visibility of directional information.
- Assign someone on event night to support accommodations and keep routes clear.
- Write a run-of-show from vendor arrival through final lockup.
- Include setup zones, sound check, volunteer briefing, doors open, check-in, announcements, planned activities, last song, student departure, vendor load-out, cleanup, lost-and-found, money reconciliation, and the person who confirms each area is complete.
- Hold a short debrief afterward and preserve the budget, floor plan, vendor notes, attendance result, and lessons for the next committee.
Suggested Products for Proms and School Dances
- Prom and dance tickets — Use for advance sales, admission, guest instructions, numbering, and a coordinated first impression.
- Wristbands — Use for quick visual admission checks, re-entry identification, access levels, and helping event staff recognize approved guests.
- Outdoor vinyl banners — Use for approved advance promotion, venue identification, and the arrival point guests see from a distance.
- Flyers — Use for ticket-sale details, guest rules, committee announcements, and handouts that need more explanatory space.
- Small posters — Use on approved bulletin boards, near ticket sales, and in school areas where students pause and read.
- Large posters — Use for entrances, commons areas, photo-area identification, or other approved high-visibility indoor displays.
- Yard signs — Use for permitted event-night parking and entrance guidance. Call for information about availability and options. Call for Information
- Photo backdrops — Use as a coordinated freestanding background for formal portraits and group photos. Call for information about availability and options. Call for Information
- Table tents — Use folded signs for table numbers, refreshments, photo booth, quiet seating, and other guest-service points. Call for information about availability and options. Call for Information
Frequently asked questions
How far ahead should a prom or school dance be planned?
Lead time depends on school approvals, venue availability, vendor contracts, and event size. Committees commonly begin major prom decisions several months ahead. Reserve the date, venue, advisor, budget framework, and major vendors first; then schedule ticketing, promotion, setup, safety review, and the final walkthrough backward from the event.
What should be printed on a prom or dance ticket?
Prioritize the event name, school or host, date, time, venue, admission terms, and any guest or arrival instruction students must see. Numbering or a detachable stub is useful only when it supports the committee's sales or check-in procedure.
How can a committee keep the dance theme consistent?
Approve one event name, color palette, type style, and core graphic direction. Reuse that system across the ticket, flyers, posters, banner, yard signs, photo backdrop, table tents, digital announcements, and room decor while keeping each item readable at its intended distance.
Which printed pieces are most useful before the dance?
Tickets support sales and entry; flyers carry detailed instructions; small posters reinforce reminders; large posters create visibility in approved high-traffic areas; and an outdoor banner can announce the event or identify the venue. Use only locations approved by the school or property owner.
Which printed pieces are most useful on event night?
An outdoor banner can confirm the entrance, permitted yard signs can direct parking and arrivals, tickets support check-in, a photo backdrop creates a planned portrait area, and table tents can identify guest-service locations. Call Best Ticket Printing for information about yard signs, photo backdrops, and table tents.
How should accessibility and safety be handled?
Use the school's approved policies and Emergency Operations Plan, the venue's procedures, and applicable local requirements. Invite accommodation requests early, inspect accessible routes and facilities, assign adult responsibilities, and make sure staff understand communication, medical, arrival, departure, and emergency roles before the event.